
Wyckoff Master Blueprint
ZynAlgo Wyckoff Master Blueprint maps accumulation and distribution structure so you can see where price sits in the cycle before you act. This Wyckoff indicator for TradingView reads range, volume and swing structure bar by bar, naming the phase while it still forms.
Key benefits
- Structure at a glance - the active phase is shaded on your chart with its name printed above it.
- Volume-confirmed events - Spring, SOS, UTAD and LPSY tags print only when volume and range conditions are met.
- A range to work against - support, resistance and mid-range lines rebuild as lookback extremes change.
- Plain-English context - a dashboard reports trend bias, current phase, latest event and why it triggered.
- Alerts that matter - eight alert conditions, one per Wyckoff event.
How it works
Volume is measured against its moving average and bar range against the 20-bar average, then positioned inside the lookback high-low range. Those tests form event conditions that advance an internal phase state from A through E. Full definitions are in the Manual.
What's included / Platforms
- TradingView indicator (Pine Script v6), chart overlay.
- Event labels, phase boxes, zigzag, support/resistance and mid-range lines, dashboard.
- Eight alert conditions and adjustable lookback, volume and display settings.
- Access through your ZynAlgo membership.
Best for
Structure and volume traders on futures, crypto and liquid stocks, H1 and higher, where ranges have room to develop.
Get started
Browse the ZynAlgo marketplace
Trading involves risk; past chart behaviour does not predict future results.
Wyckoff Master Blueprint
Where ZynAlgo Wyckoff Master Blueprint fits on your chart
Most tools try to tell you when to buy. ZynAlgo Wyckoff Master Blueprint does something narrower on purpose: it tells you where price currently sits inside a Wyckoff range, and which volume-confirmed event just happened there. It is a structure overlay, not an entry engine.
To build that read, the script works from four measurements taken on every bar:
- Volume against its own moving average over the Lookback Period, with a separate, higher threshold for climactic volume.
- Bar range (high minus low) against the 20-bar average range, used to spot narrow, quiet bars.
- Position inside the lookback range - the highest high, the lowest low and the mid-range level between them.
- Swing structure, tracked by a zigzag that connects confirmed pivot highs and lows.
Combined, those four inputs let the indicator name the phase and tag the event on your TradingView chart while the range is still forming, instead of after the breakout has already run.
Inside ZynAlgo Wyckoff Master Blueprint: the Wyckoff Phase Map
The Wyckoff Phase Map is the heart of the tool. Rather than treating every event as an isolated signal, the script keeps a running phase state and only lets it advance when the right event fires in the right order. Accumulation runs Phase A to Phase E; distribution runs Phase A to Phase D. The active phase is drawn as a shaded box across the bars it covers, with the phase name printed above it.
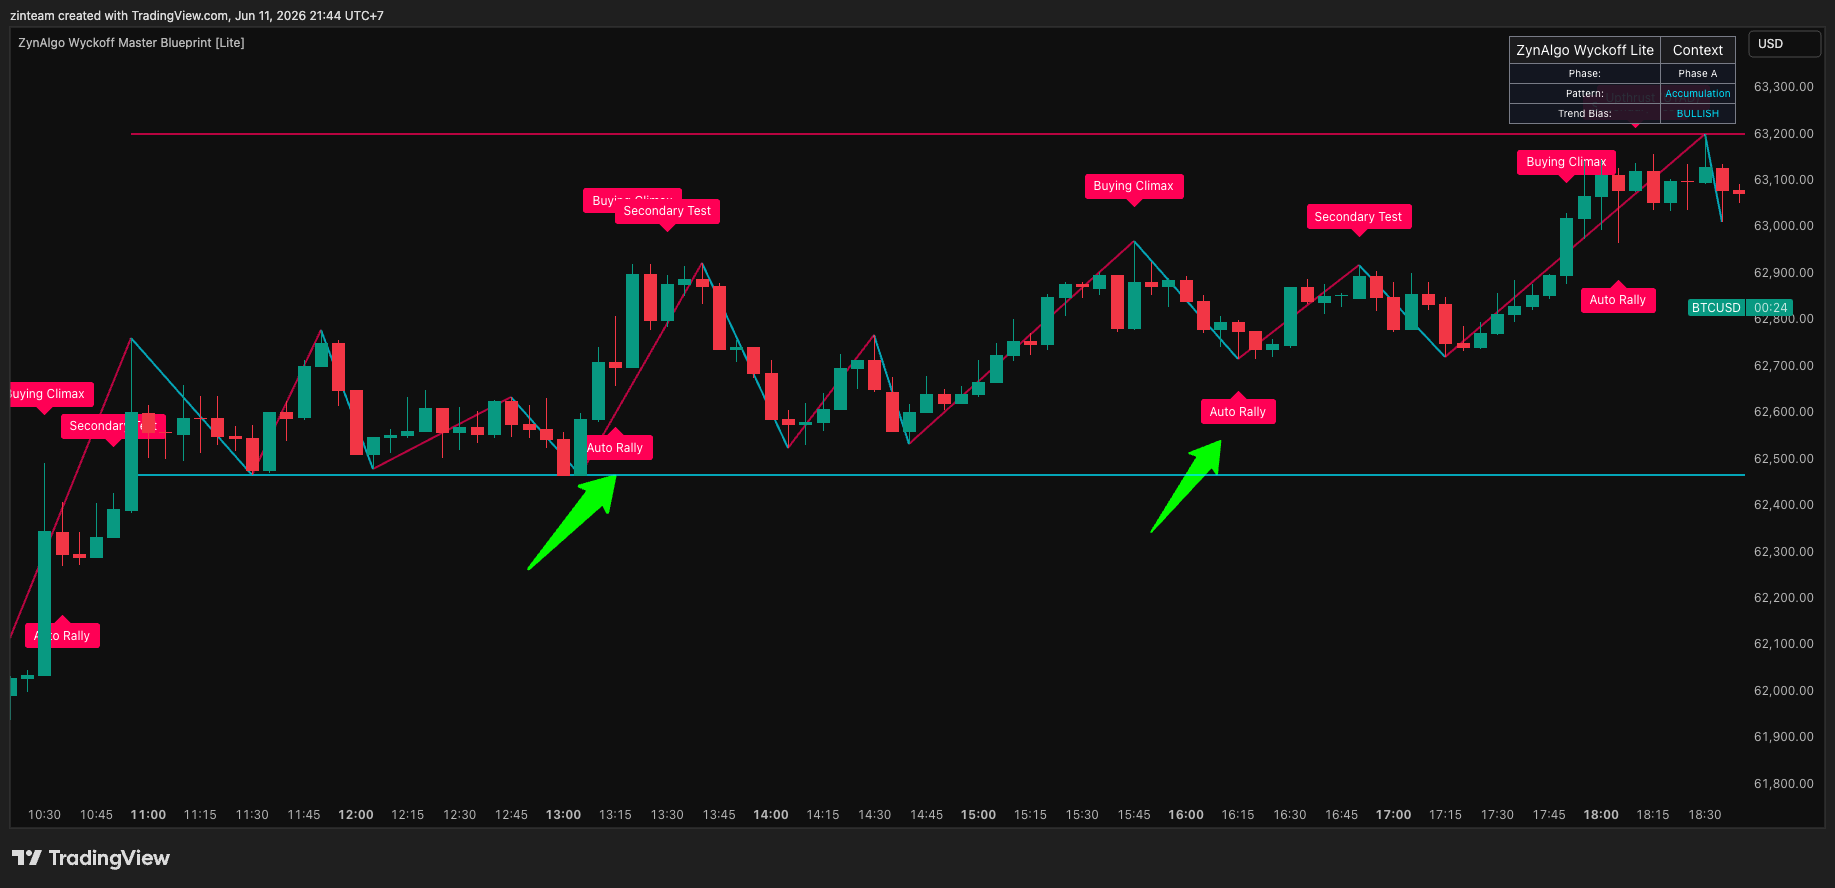
- A range begins with a climactic bar - heavy volume, a wide push, and a close that fails to hold the extreme.
- A first recovery follows on above-average volume, setting the opposite edge of the range.
- The middle of the range goes quiet: narrow bars on below-average volume, testing the same level again.
- A final sweep pokes beyond the range and closes back inside it - a spring at the bottom, an upthrust at the top.
- Only then does an expansion bar on strong volume close beyond the mid-range and confirm direction.
The common mistake is naming a phase from price shape alone. A dip under a support line is not a spring unless volume and the close back it up, and a break above resistance is not strength unless the bar is genuinely larger than recent bars. The Phase Map exists to enforce that discipline: if the conditions are not met, the phase simply does not advance.
How the Wyckoff Phase Map is defined
Every element you see on the chart comes from one of the following components. All of them are adjustable from the settings panel.
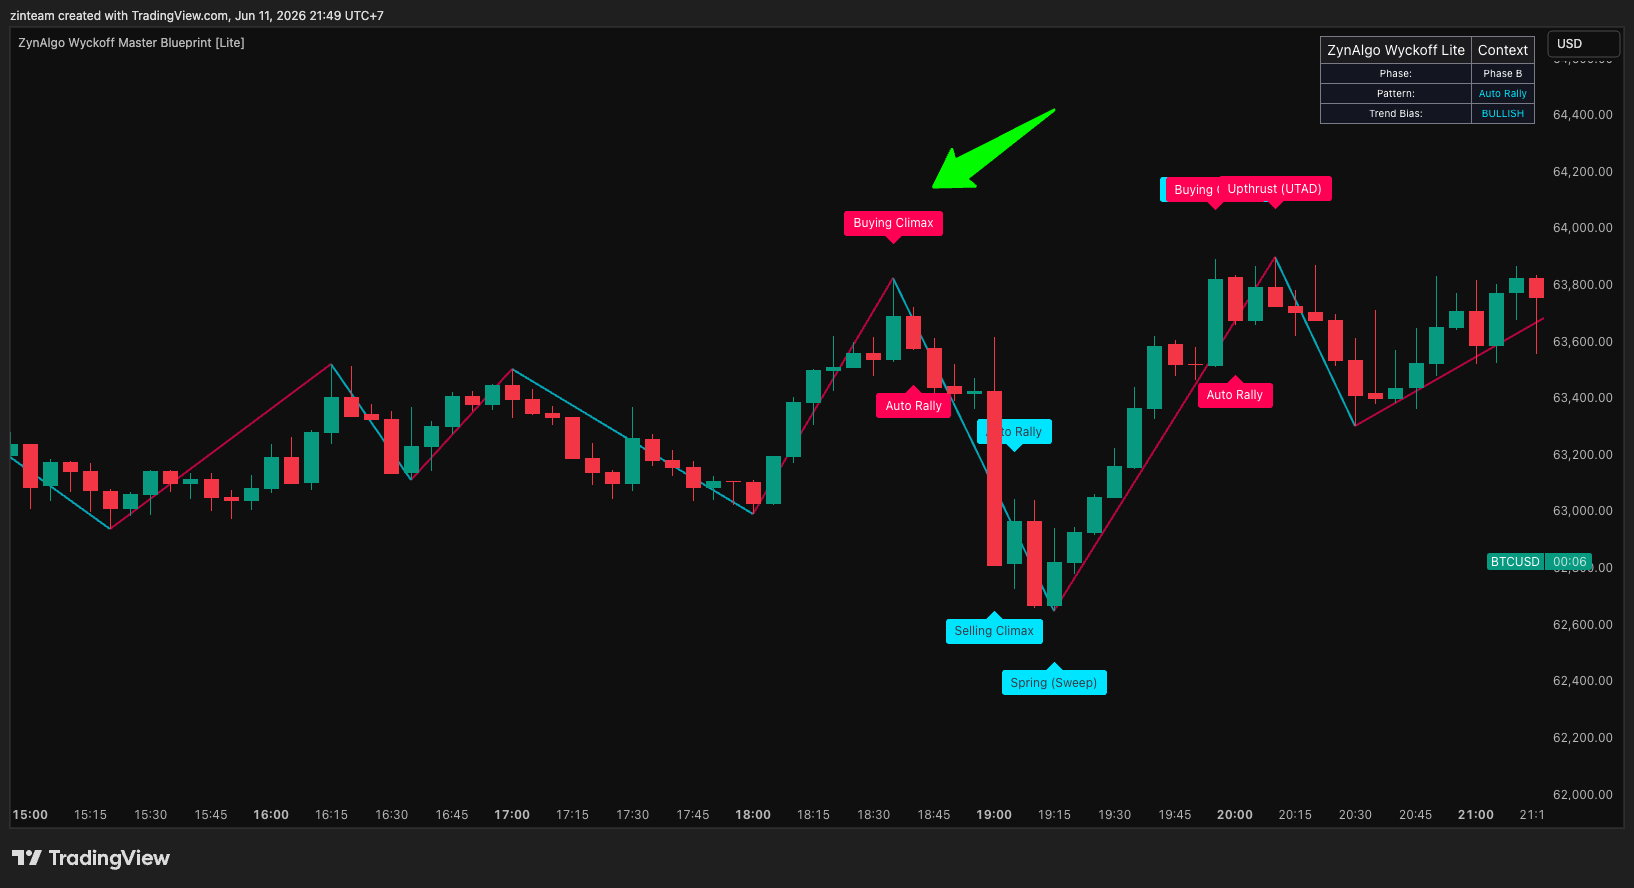
- Average volume - a simple moving average of volume over the Lookback Period (default 100 bars). It is the baseline everything else is measured against.
- Volume Spike Multiplier - default 1.5. Volume above average x 1.5 counts as high volume; above average x 2.0 counts as climactic volume.
- Average range - a 20-bar average of bar range. A bar under 60% of it is treated as a narrow-range bar, the fingerprint of a quiet test.
- Range container - the highest high and lowest low of the Lookback Period, plus the mid-range level halfway between them. These are plotted as the cyan support line, the crimson resistance line and the dashed grey mid-range line, and they redraw whenever the extremes change.
- Zigzag - a swing line built from pivot highs and lows using the Zigzag High/Low Length (default 4), colored by the direction of the current leg.
- Phase state - the Wyckoff Phase Map itself: an internal state that steps forward only on a valid event, and drives both the phase box and the dashboard.
- Dashboard - a compact table (position and scale are configurable) showing trend bias, current phase, latest event and a Smart Guide note.
Reading the signals
This is important to be clear about: ZynAlgo Wyckoff Master Blueprint does not print buy or sell arrows, does not calculate entries, stops or targets, and does not place orders. What it gives you is state - a named phase plus a named event - and you apply your own execution plan on top of it.
Eight events can be tagged on the chart. Cyan tags belong to accumulation, crimson tags to distribution:
- SC - Selling Climax. Climactic volume, a down candle closing below the previous close, with the low at or under the 30-bar low.
- AR - Automatic Rally. An up candle on above-average volume, where the previous bar set the 30-bar low and price closes more than 1% above the previous close.
- Spring - the low breaks the prior 20-bar low but the candle closes up on above-average volume, at least 1% above its own low.
- SOS - Sign of Strength. Close above the previous close, volume above 1.3x average, a body wider than the 20-bar average range, and a close above the mid-range level.
- LPS - Last Point of Support. The low holds above the last spring or secondary-test low, on an up candle with below-average volume closing above mid-range.
- BC - Buying Climax. Climactic volume, an up candle, with the high at or above the 30-bar high.
- UTAD - Upthrust After Distribution. The high exceeds the prior 20-bar high but the candle closes down on above-average volume, at least 1% below its own high.
- LPSY - Last Point of Supply. The high stays below the last upthrust or secondary-test high, on a down candle with below-average volume closing below mid-range.
Those events are also what moves the Phase Map forward. On the accumulation side: a preliminary support or selling climax opens Phase A, an automatic rally opens Phase B, a quiet test opens Phase C, a spring is flagged inside Phase C, a sign of strength opens Phase D, and a last point of support opens Phase E. On the distribution side: preliminary supply or a buying climax opens Phase A, the reactive down-leg opens Phase B, an upthrust opens Phase C, and a last point of supply opens Phase D.
The chart tags are short codes by design, to keep the chart readable. The reason behind the most recent one is written out in the dashboard: the Smart Guide row spells out what just triggered - for example "Spring: bottom liquidity sweep, final shakeout" or "UTAD: top liquidity sweep, bull trap". Read the tag on the chart, read the reason in the dashboard. The other dashboard rows give you trend bias, the current phase, and the latest event name.
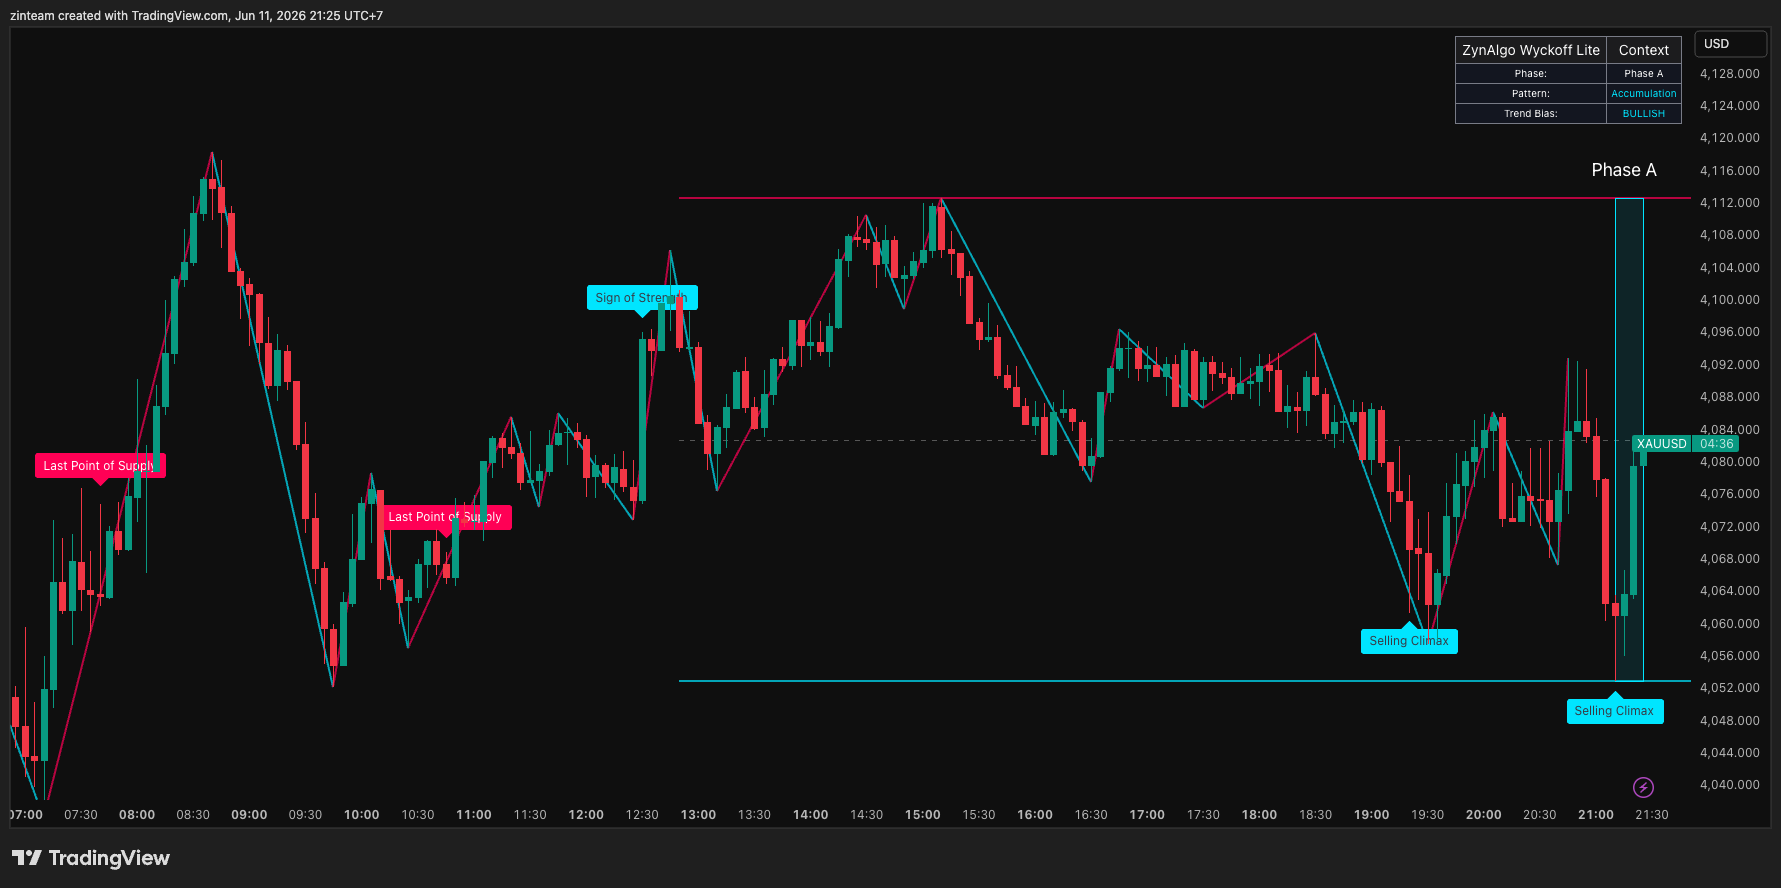
Practically, that means you are reading three market states rather than one instruction:
- Range building - climax and rally tags appear, the phase box is wide, and price keeps returning to the same extremes. Ranging conditions; breakout entries are low quality here.
- Range being tested - narrow bars on shrinking volume near a prior extreme, phase advancing to C. This is where a spring or upthrust becomes possible.
- Range resolving - an expansion bar clears the mid-range on strong volume and the phase advances to D or E. Structure is confirming, and the earlier extreme becomes the level to defend.
Eight alert conditions are exposed - one per event - so you can be notified of a selling climax, automatic rally, spring, sign of strength, last point of support, buying climax, upthrust or last point of supply without watching the chart.
Best suited for
The Blueprint suits traders who already think in terms of ranges and participation rather than fixed signals:
- Structure and volume traders who want Wyckoff phases labelled consistently instead of drawn by hand.
- Swing and position traders working on H1 and higher, where ranges have room to develop across many bars.
- Markets with meaningful volume data - index and commodity futures, crypto, and liquid stocks. On spot forex, remember your feed reports tick volume, so treat the volume-based tags as relative rather than absolute.
- Traders who already have an entry method and want better context around it, rather than a tool that decides for them.
Wyckoff rewards patience more than reaction. The value of a phase map is not that it fires often, but that it stops you from calling a breakout before the range has told you who is in control.
- Wyckoff Master Blueprint v1Aug 13, 2026
Why Your Wyckoff Accumulation Calls Fail Before the Breakout Arrives
Most traders call a Wyckoff phase by price shape alone and jump into the breakout before the range confirms who is in control. This article shows how to read volume-confirmed events inside the range structure so you stop treating every dip as a spring.
Why Wyckoff Ranges Look Clear in Hindsight but Fuzzy in Real-Time
Spotting accumulation or distribution after the breakout is easy. Naming the phase while it's still building, and knowing when the range has told you enough, is the hard part.