
Squeeze Divergence Radar
Squeeze Divergence Radar spends most of its time saying nothing, and that is the feature. It follows compression on MetaTrader 4 and only speaks when the release, the divergence and the expansion line up on the same closed candle.
Key benefits
- Two gates, not one - a signal needs an open release window and an armed RSI divergence, so a lone breakout candle is never enough
- Risk drawn with the signal - entry, an ATR-buffered stop behind the divergence swing and 1R/2R targets arrive on the chart together
- State you can read - a panel reports squeeze age, release countdown, expansion ratio and armed divergences before anything fires
How it works
Bollinger Bands compressing inside a Keltner Channel arm a release window; a confirmed RSI divergence arms a second one. A BUY or SELL prints only while both are still open and band width has expanded past its own average. Full rule set is in the Manual.
What's included
MetaTrader 4 indicator file (.ex4), with squeeze, divergence, expansion, session and risk settings open in the Inputs tab.
Best for
Intraday traders on gold, major FX pairs, indices and crypto, M5 to H1, who trade the move out of a range rather than a trend already underway.
Get started
-> Browse the ZynAlgo marketplace
Trading involves risk. This indicator is an analysis tool for educational purposes and does not guarantee results.
Squeeze Divergence Radar
Why Squeeze Divergence Radar waits for the market to go quiet
Squeeze Divergence Radar is a compression-and-release indicator for MetaTrader 4. It is built around one narrow moment: the point where a market that has been coiling finally lets go, and momentum, divergence and volatility agree on the direction. Outside that moment it is designed to stay silent.
Every closed candle is measured against:
- Compression - whether the Bollinger Bands are still trading fully inside the Keltner Channel, and for how many bars
- Momentum - a smoothed midline oscillator that has to cross zero, or price that has to close outside the Bollinger Band
- Divergence - RSI(14) read at confirmed swing highs and lows and compared with the previous swing
- Expansion - current band width against its own 50-period average
- Context filters - optional higher-timeframe RSI slope, trading session, spread cap, and a cooldown between signals
What lands on your MetaTrader 4 chart is the compression map itself - bands, a colour-coded midline, divergence lines - plus a signal that prints only on a closed candle, with its stop and targets already measured.
What has to be armed before a signal can exist
The engine runs in two phases. Nothing fires straight off a candle pattern: two separate windows have to be open first, and each one expires on its own countdown.
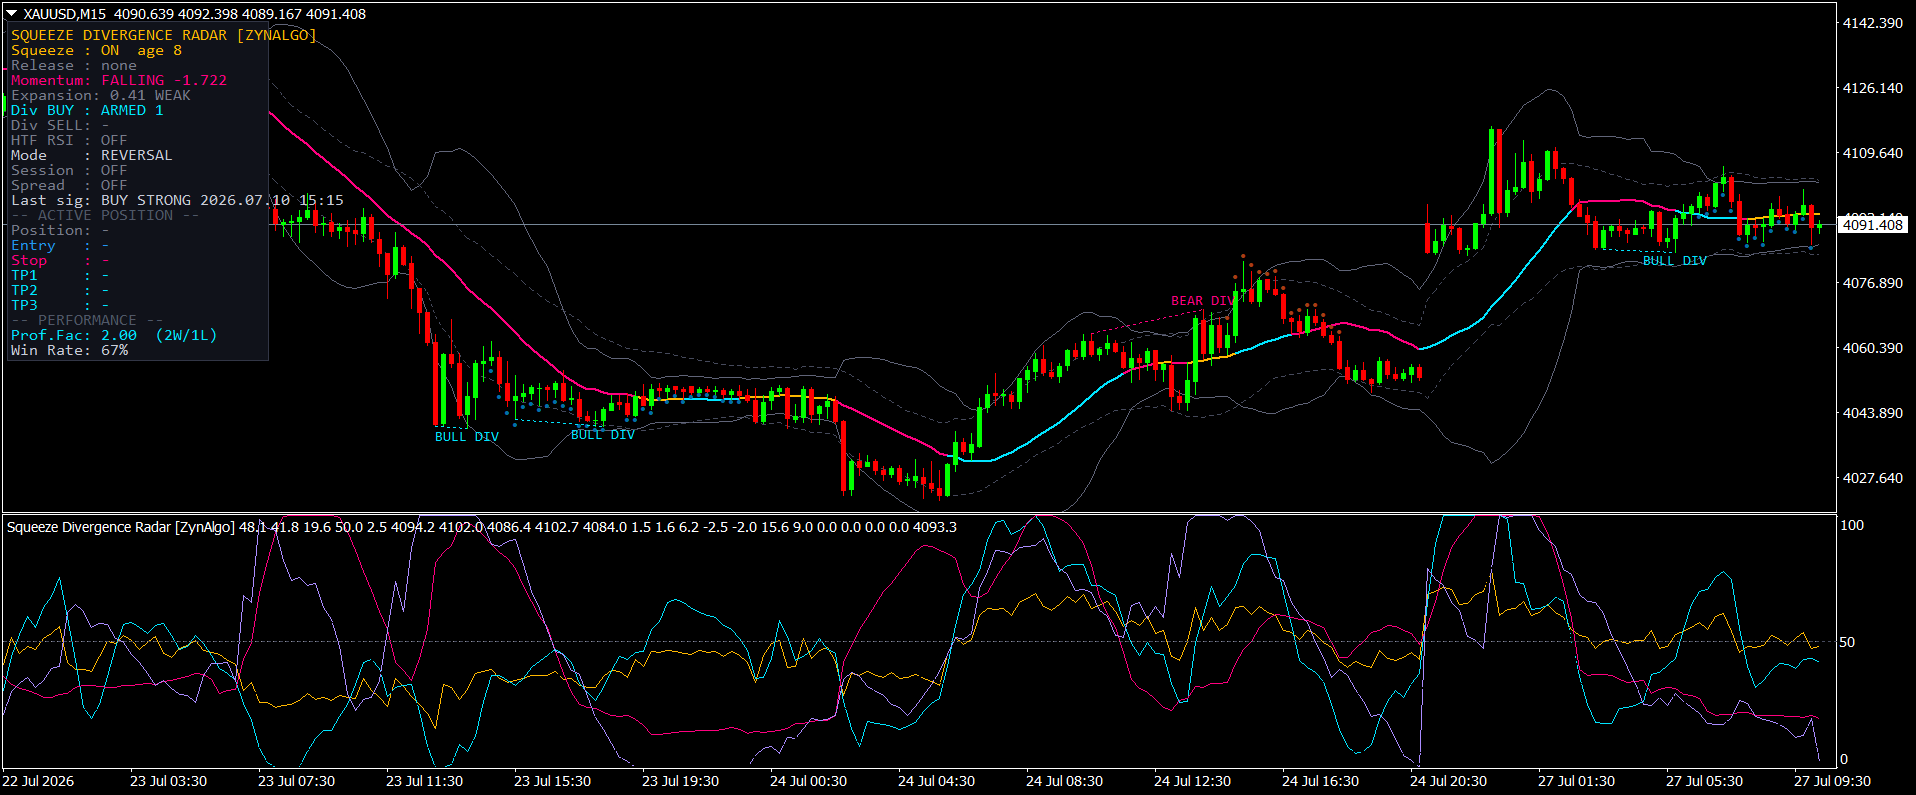
- The Release Window opens once a genuine squeeze ends, and stays open for a limited number of bars - 12 by default
- The Divergence Window opens when a confirmed RSI divergence is found, and stays open for 15 bars by default
- The status panel in the top-left corner reports both live, so you can see what is armed before anything is drawn
The mistake this design is built around is buying the first candle that pushes out of a tight range. Compression on its own is not an edge - plenty of squeezes leak one way and reverse. Requiring an armed window means the breakout you act on is one the indicator was already tracking, not one it noticed afterwards.
How the two windows are defined
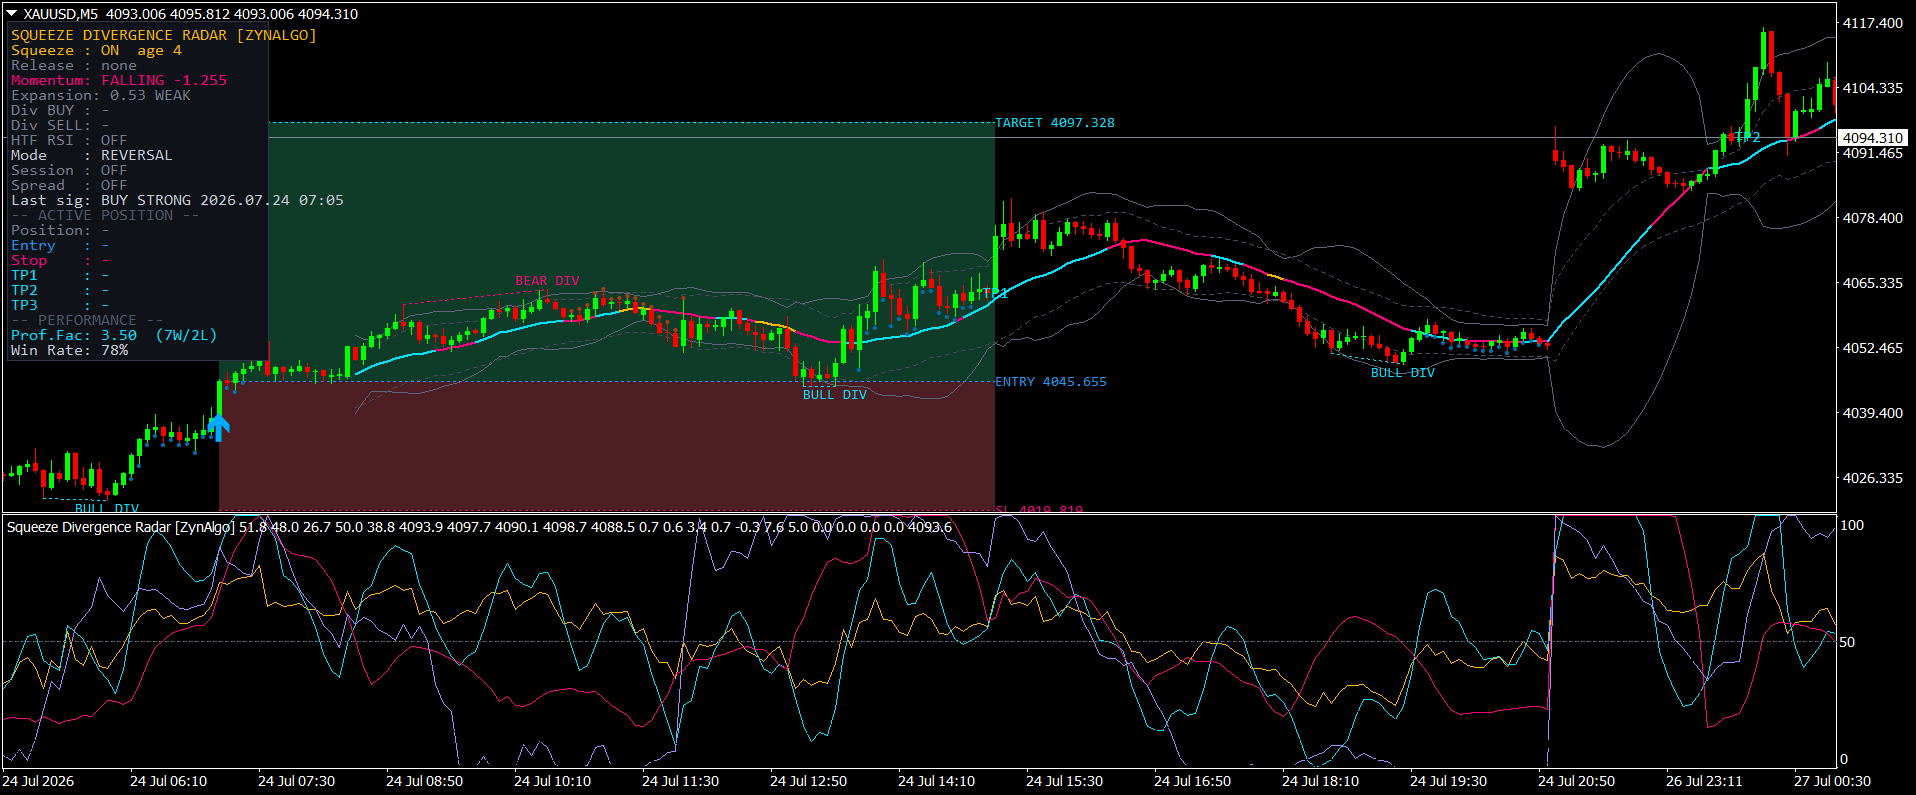
- Squeeze - counted while the upper Bollinger Band sits below the upper Keltner band and the lower Bollinger Band sits above the lower one. The panel prints "Squeeze : ON" with the running bar count, and the chart midline turns amber
- Release - once a squeeze has lasted at least 6 bars (Min squeeze duration), the window arms either when the compression ends or when squeeze momentum crosses zero while price is still compressed. The sign of momentum sets the direction
- Divergence - swing highs and lows are confirmed with 3 bars on each side; a bullish divergence needs a lower price low against a higher RSI low, at least 1.0 RSI point apart, with no more than 40 bars between the two swings. It is drawn as a dotted line labelled BULL DIV or BEAR DIV
- Expansion - band width divided by its own 50-period average; the panel shows the live ratio as OK or WEAK against the threshold, 1.0 by default
- ATR(14) - the volatility yardstick behind marker spacing, stop distance and the optional swing-proximity block
From armed to fired: reading a signal
Signals are evaluated on closed candles only, never on the candle still forming.
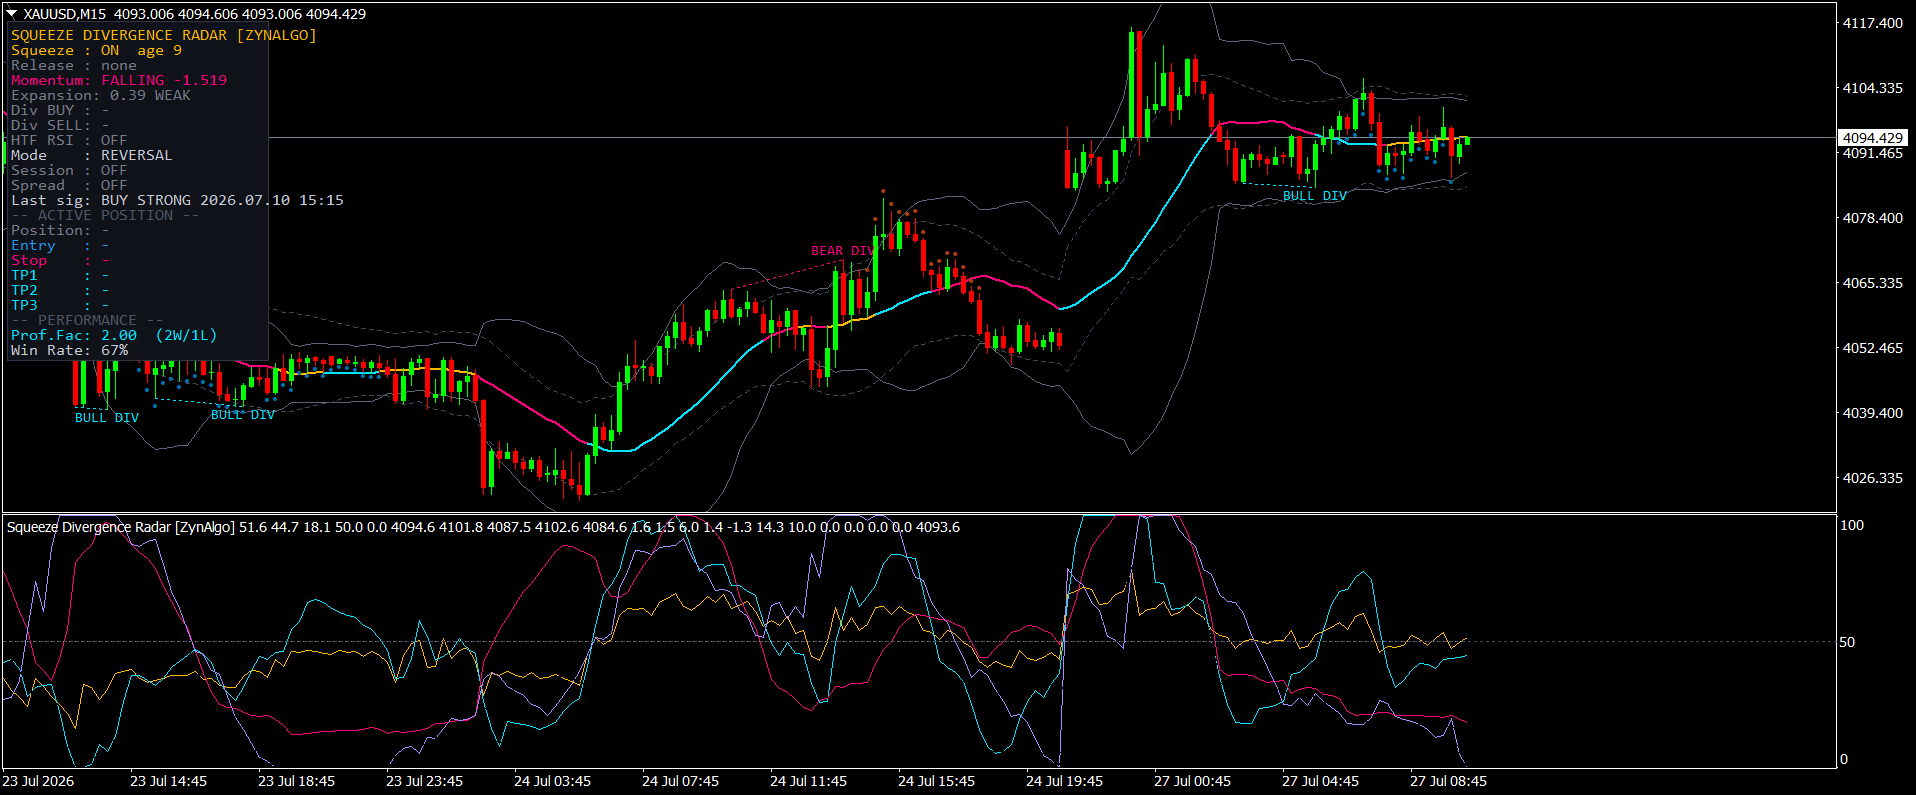
A BUY prints when:
- Squeeze momentum crosses above zero, or price closes back above the upper Bollinger Band
- The bullish Release Window is still open
- In Reversal mode - the default - the bullish Divergence Window is still open as well
- Band width has cleared the expansion threshold
- No BUY has printed within the cooldown of 6 bars, the session filter allows the bar, and price is not inside the optional block distance of the last opposite swing
A SELL is the mirror image: momentum crossing below zero or a close below the lower band, an open bearish Release Window, an armed bearish divergence in Reversal mode, and the same expansion, cooldown and session gates.
What appears on the chart:
- A solid arrow below the candle for BUY and above it for SELL, offset by 0.30 ATR
- Small chevron dots while a divergence is armed but nothing has fired - the setup is forming, not triggered
- A trade box with ENTRY, SL and TARGET labels: entry at the signal candle close, stop beyond the divergence swing (or the last 10-bar extreme) plus half an ATR of buffer, then targets at 1R and 2R by default, with 3R available
- A status panel naming the last signal and its timestamp, the live position levels, and the running Profit Factor and Win Rate of the signals on that chart
Switching Signal mode to Continuation replaces the divergence requirement with a higher-timeframe RSI slope check. A weaker "drift" tier exists for study and is switched off by default, so a standard chart shows strong signals only. Note that the indicator marks the chart rather than sending pop-up alerts - that is deliberate, so you read the state on the panel rather than react to a message.
Who gets the most out of this radar
It suits you if:
- You trade the transition out of a range rather than chasing a move already running
- You want a reversal argument - an RSI divergence - behind a breakout, not just a volatility spike
- You are comfortable reading a separate logic pane (RSI, momentum, band width and ATR, all normalised 0-100) next to the price chart
- You work intraday on liquid instruments: gold, major FX pairs, indices and crypto
Working ranges from the product spec: XAUUSD M15-H1 - FX majors M15-H1 - indices M5-M30 - crypto M15-H4. Symbol names for indices and crypto differ between brokers, so match the instrument rather than the exact ticker.
It suits you less if you want constant activity. Two windows, an expansion test and a cooldown will always produce fewer marks than a tool that reacts to every band touch - that is the trade the indicator makes on your behalf.
Installing it: copy the .ex4 file into the MQL4/Indicators folder inside your terminal data folder, refresh the Navigator panel in MetaTrader 4, then drag Squeeze Divergence Radar onto a chart. If you were issued an Access Key, paste it into the Access Key input. Every threshold above is editable in the Inputs tab.
-> Browse the ZynAlgo marketplace
This indicator is provided for educational purposes only and is not financial advice. Trading involves risk; past performance and backtested behaviour do not guarantee future results.
- v1Jul 22, 2026
Initial release
Why breakouts reverse after a tight squeeze and how divergence filters them
Most traders enter the first candle that pushes out of a compression zone, only to watch it reverse. This article explains how waiting for RSI divergence and momentum agreement during the release cuts down false breakout entries.

Why Breakouts Fail After Tight Ranges and How to Filter Them
Most traders buy the first push out of a squeeze. Squeeze Divergence Radar waits for compression, divergence and expansion to align, so the breakout you act on is already armed.